
Managing Mason Catalog Search Results
Learning Outcomes
After using this tutorial, you will be able to use different tools to save, label, and utilize results from your library searches.
Video Tutorial
Step-by-Step Guides
Use the dropdowns to learn how to manage Mason Catalog search results by saving, labelling, exporting, and more.
Getting started
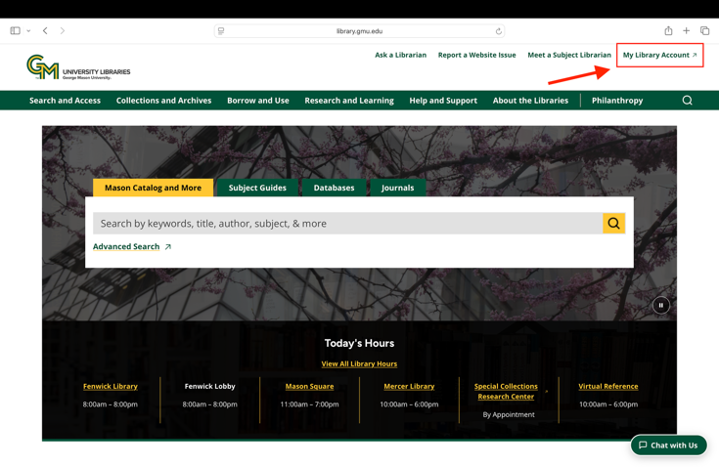
Sign into your library account to have access to all the features the George Mason library provides.
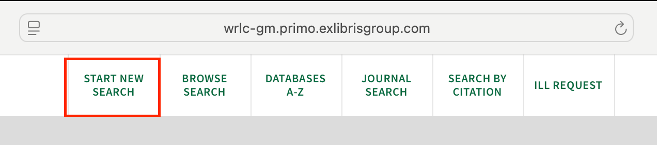
Select “Start New Search” from the menu at the top of the page.
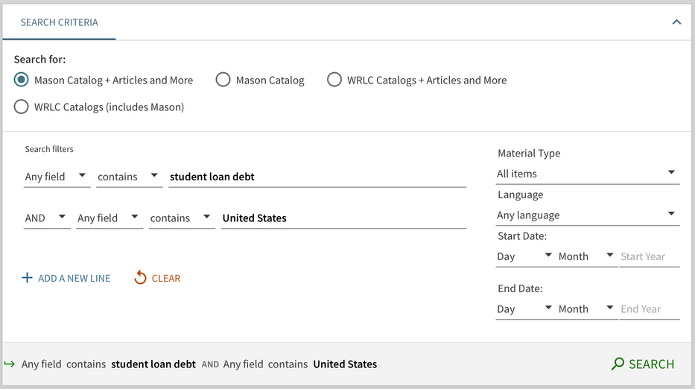
Select the “Advanced Search” button to the right of the search bar.

Enter your search terms and hit the enter key or select the “Search” button. For our example search, we’ll put the keywords “student loan debt” into one line of the advanced search dialog and “United States” into the second line. For more help searching for sources, see our Research Tutorials page.
Scroll or tab down the page to view the search results.
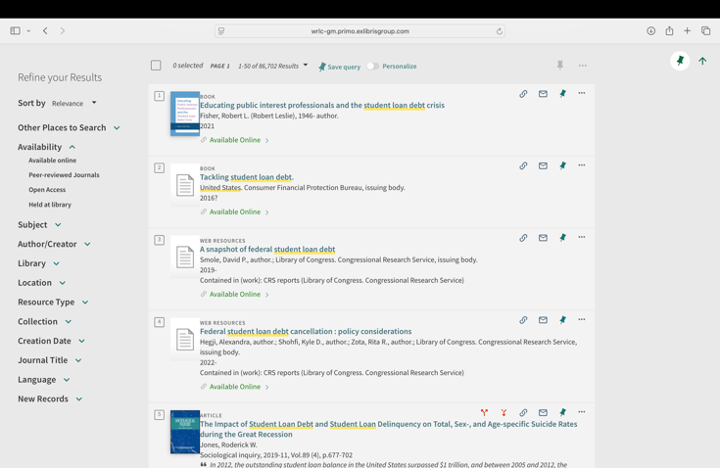
Toggling between Favorites tab and search results
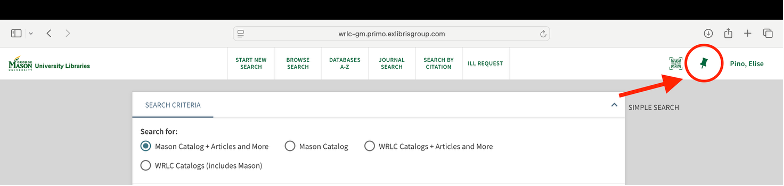
When you are on a page of search results, you can navigate to the Favorites tab by selecting the pushpin button from the top menu. This button has the alt text “Go to my favorites.”
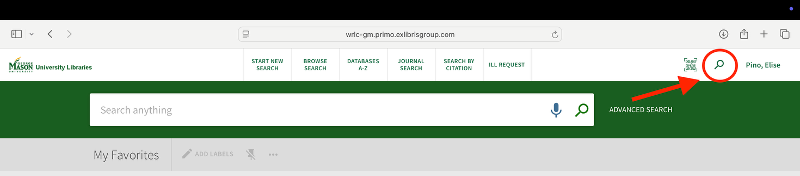
When you are on the Favorites tab, you can navigate back to your search by selecting the magnifying glass icon from the top menu, which has the alt text “Go to search.”
Saving the search and setting up search alerts
You can save your search to return to it later and set up alerts to get notified when new items that match this search are added to the Libraries’ collection with these steps.
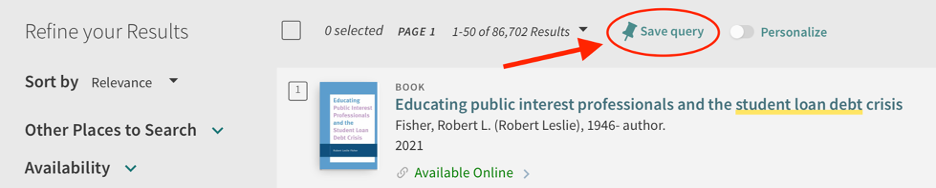
Select the button labelled “Save Query” above the search results. This button has the alt text “Save this search to your favorites.”
- Navigate to the Favorites tab (see Toggling between Favorites tab and search results above).
Select the Saved Searches tab to view all your saved searches.
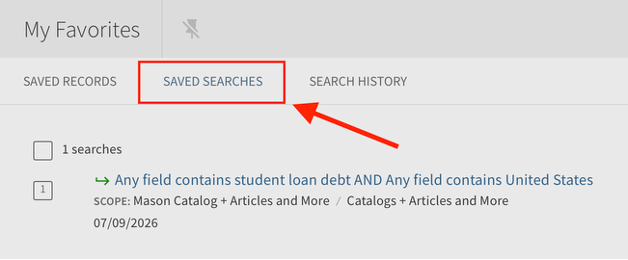
Select the bell-shaped icon next to the search, which has the alt text “Set an alert for this search,” to set up an alert for when items matching this search get added to the collection.

Saving items to Favorites
You can save items to Favorites to easily refer to them later with these steps.
Saving items individually
From the search results, select the pushpin icon on an item’s record. This button has the alt text “Add to Favorites.”

- Navigate to the Favorites tab to view saved items (see Toggling between Favorites tab and search results above). By default, you will be on the Saved Items tab.
Saving multiple items at once
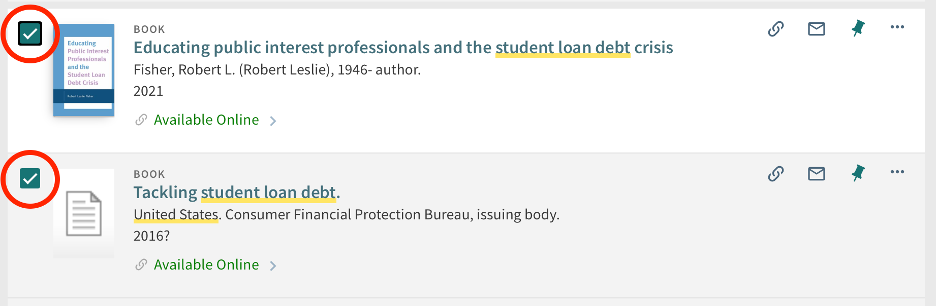
From the search results, select the radio button for each item you want to save.
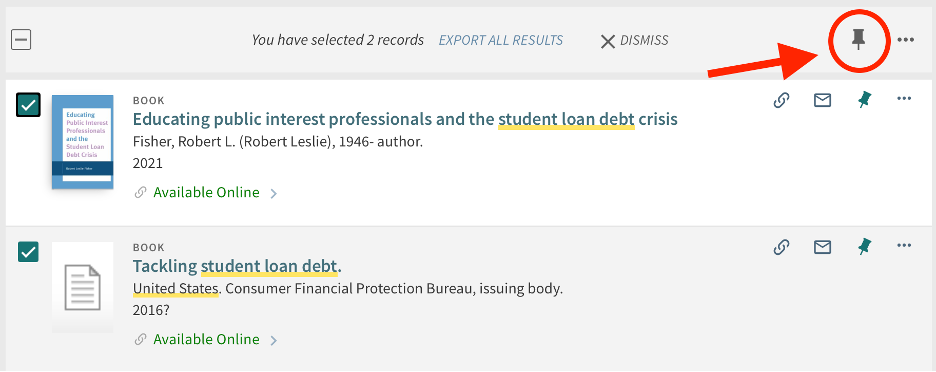
Select the pushpin icon from the menu bar above the search results and select “Add to Favorites.” This icon has the alt text “Add this item.”
- Navigate to the Favorites tab to view saved items (see Toggling between Favorites tab and search results above). By default, you will be on the Saved Items tab.
Removing items from Favorites
You can remove items from Favorites once you no longer need them with these steps.
Removing items individually
- Navigate to the Favorites tab to view saved items (see Toggling between Favorites tab and search results above). By default, you will be on the Saved Items tab.
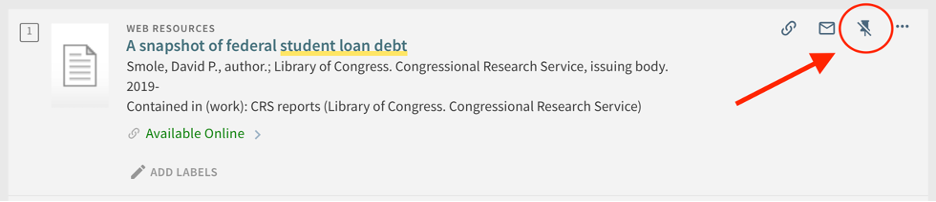
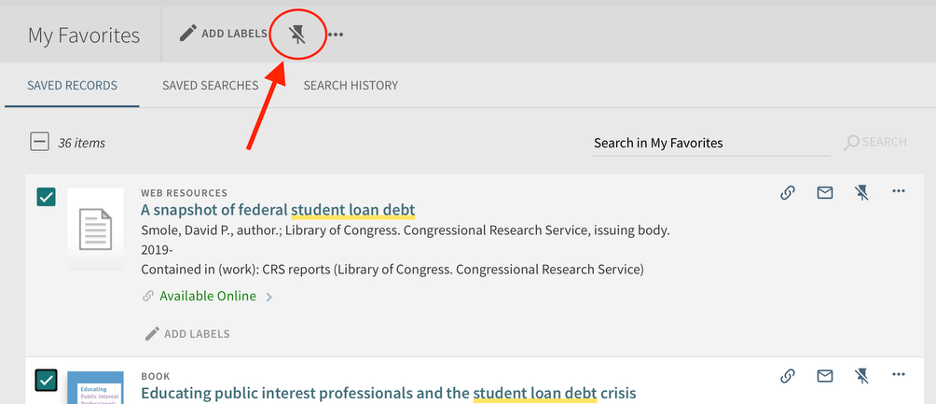
Select the pushpin icon with the strikethrough from the menu of the item you wish to remove. This button has the alt text “Remove from Favorites.”
Removing multiple items at once
- Navigate to the Favorites tab to view saved items (see Toggling between Favorites tab and search results above). By default, you will be on the Saved Items tab.
Select the radio button for each item you wish to remove.
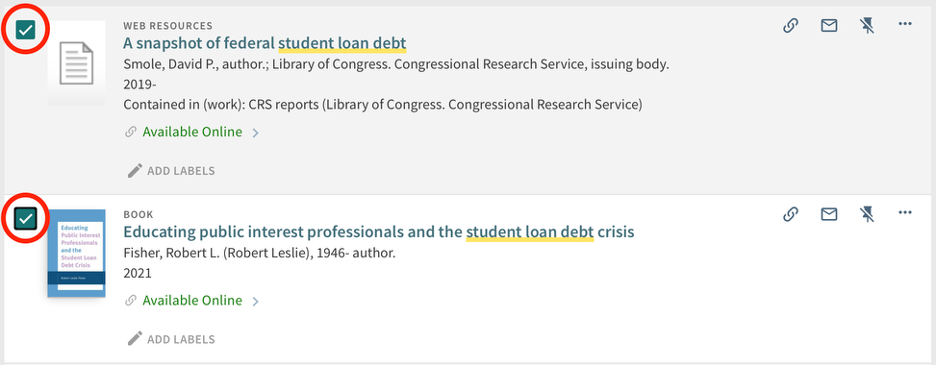
Select the pushpin with a strikethrough from the menu. This icon has the alt text “Remove Selected Items.”
Adding labels
You can add labels to items in your Favorites to easily sort them into categories like genre, topic, or project with these steps.
Adding labels individually
- Navigate to the Favorites tab to view saved items (see Toggling between Favorites tab and search results above). By default, you will be on the Saved Items tab.
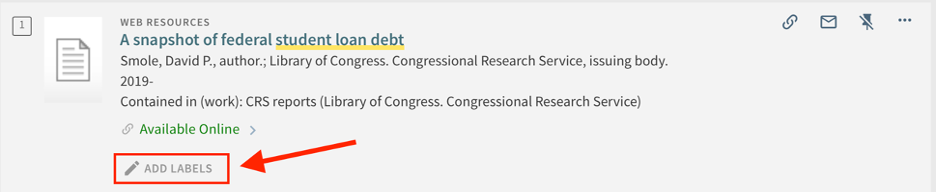
Select the Add Labels button on the item’s record. This button has the alt text “Add or remove labels for selected items.”
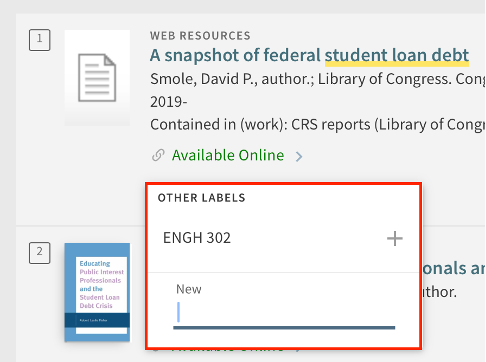
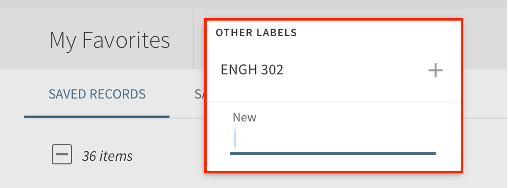
Type the label you want on the item and press the Enter key, or select an existing label.
Adding labels to multiple items at once
- Navigate to the Favorites tab to view saved items (see Toggling between Favorites tab and search results above). By default, you will be on the Saved Items tab.
Select the radio button for each item you wish to label.
Select the Add Labels button from the menu, which has the alt text “Add or remove labels for selected items.
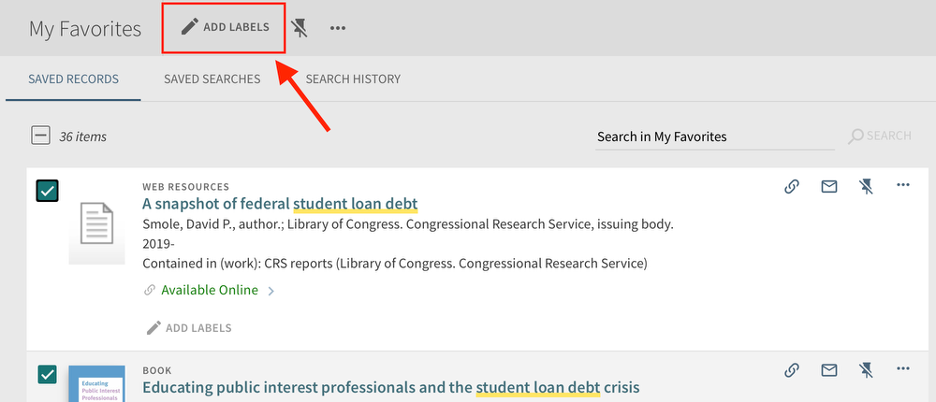
Add a new label, or select an existing label.
Exporting and citing items
You can export items to various tools, generate citations for items, and get permalinks from the Favorites page with these steps.
- Navigate to the Favorites tab to view saved items (see Toggling between Favorites tab and search results above). By default, you will be on the Saved Items tab.
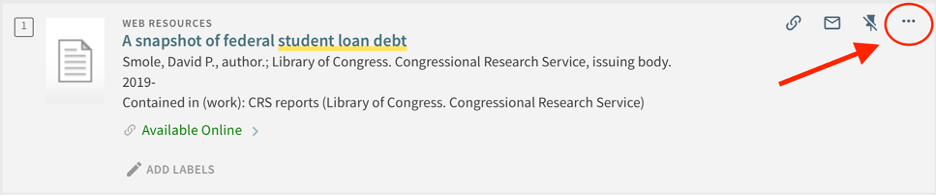
Select the ellipsis in the item’s record, which has the alt text “Show action items.”
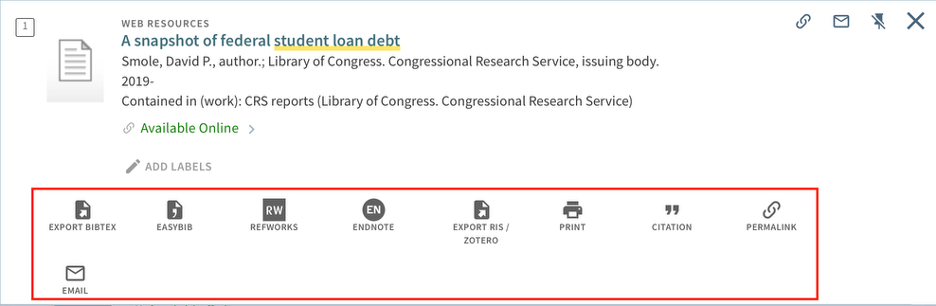
Select the relevant button from the menu bar that appears.
- Export to supported tools including BibTex, EasyBib, RefWorks, EndNote, and Zotero.
- Use the Email button to open an email sharing the item.
- Use the Citation button to generate a citation.
- Use the Permalink button to display the permalink to the item’s record.
More Resources
To find articles and other resources in your discipline, browse your subject guide. If you have questions or need more help, review our other tutorials on finding library resources or reach out to us through Ask a Librarian.

